The Formation Number Is Not a Map
Formation numbers describe a starting shape, not every position in a match. Learn to read phase-specific roles and choose the right tactical lens.
A formation number is a starting clue, not a map of every position a team will occupy. In a football match preview, calling a side a 4-3-3 can help describe its initial arrangement, but it cannot tell you where the full-backs, midfielders, or wingers will appear once possession changes hands.
The useful question is not simply which formation a team uses. It is what the players are asked to do in each phase: build from the back, attack a settled defense, or protect space after losing the ball. Reading those roles makes a preview more precise without turning the team sheet into a promise it cannot keep.
Formation numbers describe a reference shape
Formation labels count players by broad lines, usually excluding the goalkeeper. They offer a compact description of how a team is arranged at a particular moment, often when defending or beginning possession. A 4-2-3-1 suggests a back four, two deeper midfielders, a line of three, and one striker. It does not establish that those lines will remain intact.
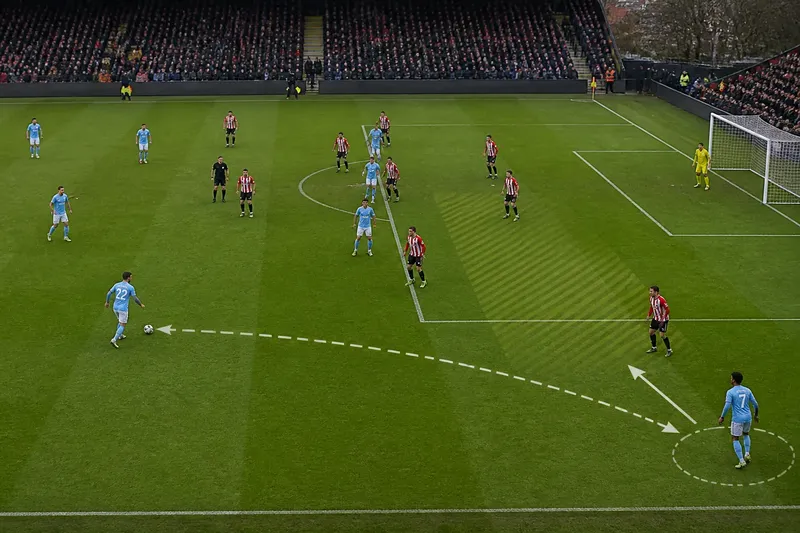
Players move to solve the problem in front of them. A center-back may carry the ball forward; a full-back may advance into the attack; a winger may drop beside the midfield. The label stays the same on a broadcast graphic while the relationships on the pitch change.
That difference matters when comparing previews. Two teams listed in the same formation can behave quite differently. One may keep its full-backs near the center-backs during buildup, while another sends them forward and asks a midfielder to cover the space they leave.
Read the team through its phases
A match preview becomes clearer when it separates three phases. The names vary between analysts, but the practical distinction is straightforward:
- In possession: How does the team move the ball forward, and which players occupy width, depth, and central spaces?
- Out of possession: Where does it form its defensive block, and who is responsible for pressing or covering?
- During a transition: What happens immediately after the ball changes hands, and which spaces are exposed or targeted?
These are not separate formations so much as different jobs within one match plan. A team can defend in a compact 4-4-2, build with three players across its first line, and attack with a midfielder arriving beside the striker. Calling it only a 4-4-2 hides the changes; listing every position as if it were fixed hides the plan.
For a preview, note the phase before describing the shape. “They may form a 4-4-2 when defending” is more useful than “They are a 4-4-2,” because it tells the reader when that arrangement is expected and leaves room for the team’s other movements.
Three ways to interpret a team’s shape
Use the listed formation as a baseline
The team-sheet formation is the easiest starting point. It suits readers who want to identify broad matchups quickly: two central midfielders against three, for example, or one striker against a pair of center-backs. It is also useful when detailed tactical information is limited.
Its weakness is that the label can encourage false certainty. A listed winger might defend as a wing-back, or a nominal attacking midfielder might join the front line. Treat the number as a hypothesis about initial structure, then look for evidence in the team’s likely roles.
Describe the shape in each phase
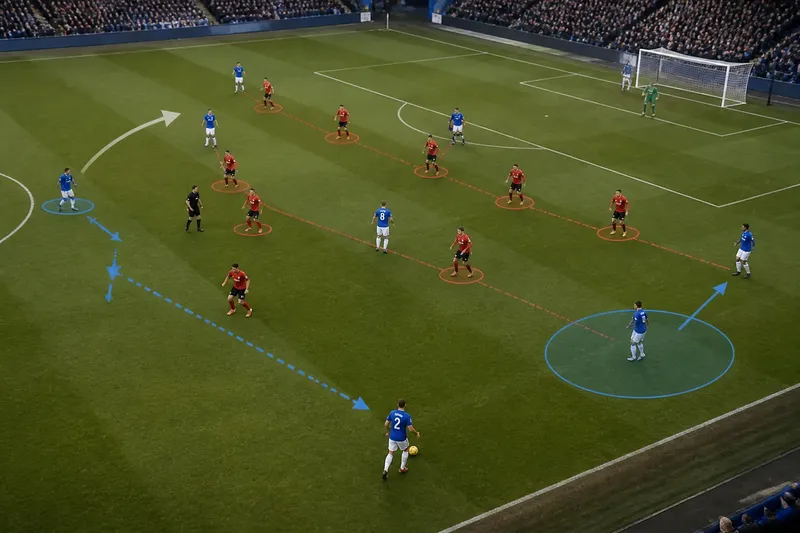
A phase-by-phase account suits a tactical preview where buildup and defensive organization are central to the contest. It can explain how a back four becomes a back three when one full-back moves forward, or how a lone striker gains support when a midfielder advances.
This approach needs careful wording. If the exact pattern is uncertain, say that a player may move into a role rather than declaring that the team will do so. A projected shape is an interpretation, not a formation printed on the grass.
Track roles and relationships
Role-based analysis follows what players do rather than where a formation graphic places them. It suits previews focused on a particular tactical choice: who provides width, who protects the center, or who steps out to press an opposing midfielder.
Relationships often explain more than isolated positions. If a full-back advances, does a midfielder cover behind him? If a striker drops short, does a winger run beyond? Those connections reveal how a team intends to create space and what might break if the opponent disrupts one part of the arrangement.
Choose the lens that fits the question
Use the formation label when the question is broad and the likely starting matchup matters most. Describe phases when the preview needs to explain how the team builds or defends. Follow roles when the central issue is an individual responsibility or a connection between players.
Say you are previewing a team listed in a 4-3-3 against an opponent that presses high. Imagine its right-back is likely to stay deeper while the left-back advances, with a midfielder shifting across to cover. The useful observation is not that the team “plays a 3-2-5” as a permanent fact; it is that its buildup may leave three players behind the attack and use two midfielders to support circulation. That wording identifies the tactical choice and the area the opponent might target if possession is lost.
It is not worth assigning a fresh formation number to every moment. A string of labels can look exact while making the match harder to picture. Name the movement that matters, then explain what it helps the team do.
What should a formation label tell you?
Does a formation stay the same throughout a match?
Usually, players alter their positions as possession and pressure change. A team may defend in one arrangement and use another to build or attack.
Why can two teams with the same formation play differently?
The number says little about individual duties. Full-backs, midfielders, and forwards can be given different responsibilities even when the listed shape is identical.
Which shape matters most in a match preview?
Choose the phase that best explains the likely contest. Use the defensive shape to discuss pressing and protection, the buildup shape to discuss routes forward, or player roles to explain a specific matchup.
How can I tell whether a projected role is plausible?
Check the likely personnel and the jobs those players can perform, then compare the proposed movement with the team’s tactical needs. Where selection or instructions are uncertain, present the role as a possibility rather than a settled fact.
Describe the movement, not just the number
A useful preview gives readers a way to watch the match unfold. Instead of stopping at “a 4-2-3-1 against a 4-3-3,” identify the players expected to change lines, the spaces those movements open, and the teammate responsible for covering them. That makes the formation number a starting reference rather than a substitute for analysis.
The formation number is not a map because players are solving changing problems, not standing on marked squares. For a clear tactical account, use the label sparingly, specify the phase, and connect each expected role to an observable action: a full-back staying back, a midfielder dropping between defenders, or a forward pressing a center-back. The reader can then check the idea against the match rather than trying to match every moment to a diagram.